How to Use Schema Markup for AI Citation Optimization and Get AI Credits
Use Schema markup, structured authorship, and Google Alerts tracking to optimize content for AI citations. Measure what works and improve citation rates systematically.
About 80% of consumers now rely on zero-click results in at least 40% of their searches. As a result, your organic web traffic and the clicks to pages are reducing. The question now is how can you pivot to keep your site relevant and consider being cited by an AI as the new conversion.
We earlier wrote an article about zero-click SEO 2026. When ChatGPT or Gemini 3 scans your page, they're not reading it the way humans do. They're looking for clean, structured signals that tell them what's fact, who said it, and whether it's worth repeating. Schema markup is that translator that does the heavy-lifting here. It converts HTML of your site pages into a language AI models actually understand and trust.
How Sites With Schema Win AI and LLM Citation
As of today, it is likely that many of your competitors are publishing the same advice you are. But if their page has Schema labeling the author, the publish date, the topic, and the key claims - they would have an upper hand. When GPT-5.2 generates an answer, it will quote such competitors by name. Yours will get paraphrased into nothing or ignored completely if you lack the supporting infrastructure.
Schema markup provides structured, machine-readable context that helps AI models understand and accurately cite your content in generative search results. For context, if your content is a conversation, Schema would be the subtitle file. Without it, AI models can only guess at what you meant. With it, they will know exactly what you said and who you are. AI citation optimization is now an increasingly adopted tactic for anyone who wants to survive when clicks disappear and citations matter. Once optimized, when an LLM sees your Schema over and over, clean and consistent, it assigns you an authority score and starts treating you like a trusted source. Notably, users never see that score, but can only see the results when your name shows up in every AI summary.
Follow these steps to deploy Schema for LLMs and maximize your site’s AI citation potential.
Why Schema Is the Only Translator AI Models Actually Trust
Microsoft confirmed in March 2025 that schema markup helps their LLMs understand content, specifically for Bing's Copilot AI. Google never issued a press release, but Google's engineers admitted that schema plays a critical role in grounding their generative AI systems. AI Overviews pull heavily from pages with strong structured data because it reduces hallucination risk. When an LLM can verify the author, date, and topic through Schema, it quotes with confidence. When it can't, it hedges or skips you entirely.
AI models don't browse the web like people. They don't appreciate good design or clever headlines. Instead, AI models scan for patterns, extract facts, and rank sources based on how confident they are in what they found. Schema for LLMs works because it removes ambiguity.
When you add Organization Schema to your homepage, you're telling every crawler who you are, what you do, and where else you exist online. When you add Article Schema, you're labeling authorship and expertise. When you add FAQPage Schema, you're serving up perfect question-answer pairs that map directly to how LLMs generate responses.
You can write the best answer on the internet, but if it's not wrapped in Schema, AI treats it much like an anonymous Reddit comment. It might "understand" your point, but it won't "trust" it enough to give you a verified citation. Add Schema, and suddenly you're a named expert with verifiable credentials. That shift is everything in AI citation optimization.
The Five Schema Types That Help with AI Citations of a Site
Organization, Article, FAQPage, Person and WebPage schemas provide the clarity AI systems need to understand your brand and expertise. If you are just starting, forget the other Schema types and simply focus on these five first.
- Organization Schema goes on your homepage. It establishes who you are in the eyes of Google's Knowledge Graph and every LLM scraping the web. Only with this appropriately defined, you would be considered as an entity by the LLM. Without this, you're just a domain.
- Person Schema works if you're a consultant, creator, or solo expert. It connects your name to your work and credentials so AI knows you're a real human with a track record.
- Article Schema wraps every blog post, guide, or opinion piece you publish. It tells AI who wrote it, when, and what it's about. This is baseline hygiene for anyone serious about the zero-click SEO 2026 strategy.
- FAQPage Schema is for structured Q&A because AI models love them to match how they generate answers. When you give them clean question-answer pairs, you're basically writing the script they'll quote.
- WebPage Schema ties everything together and gives crawlers a semantic map of what each page actually covers.
Deploy these five and you build a scaffolding around your content that AI can navigate, trust, and cite.
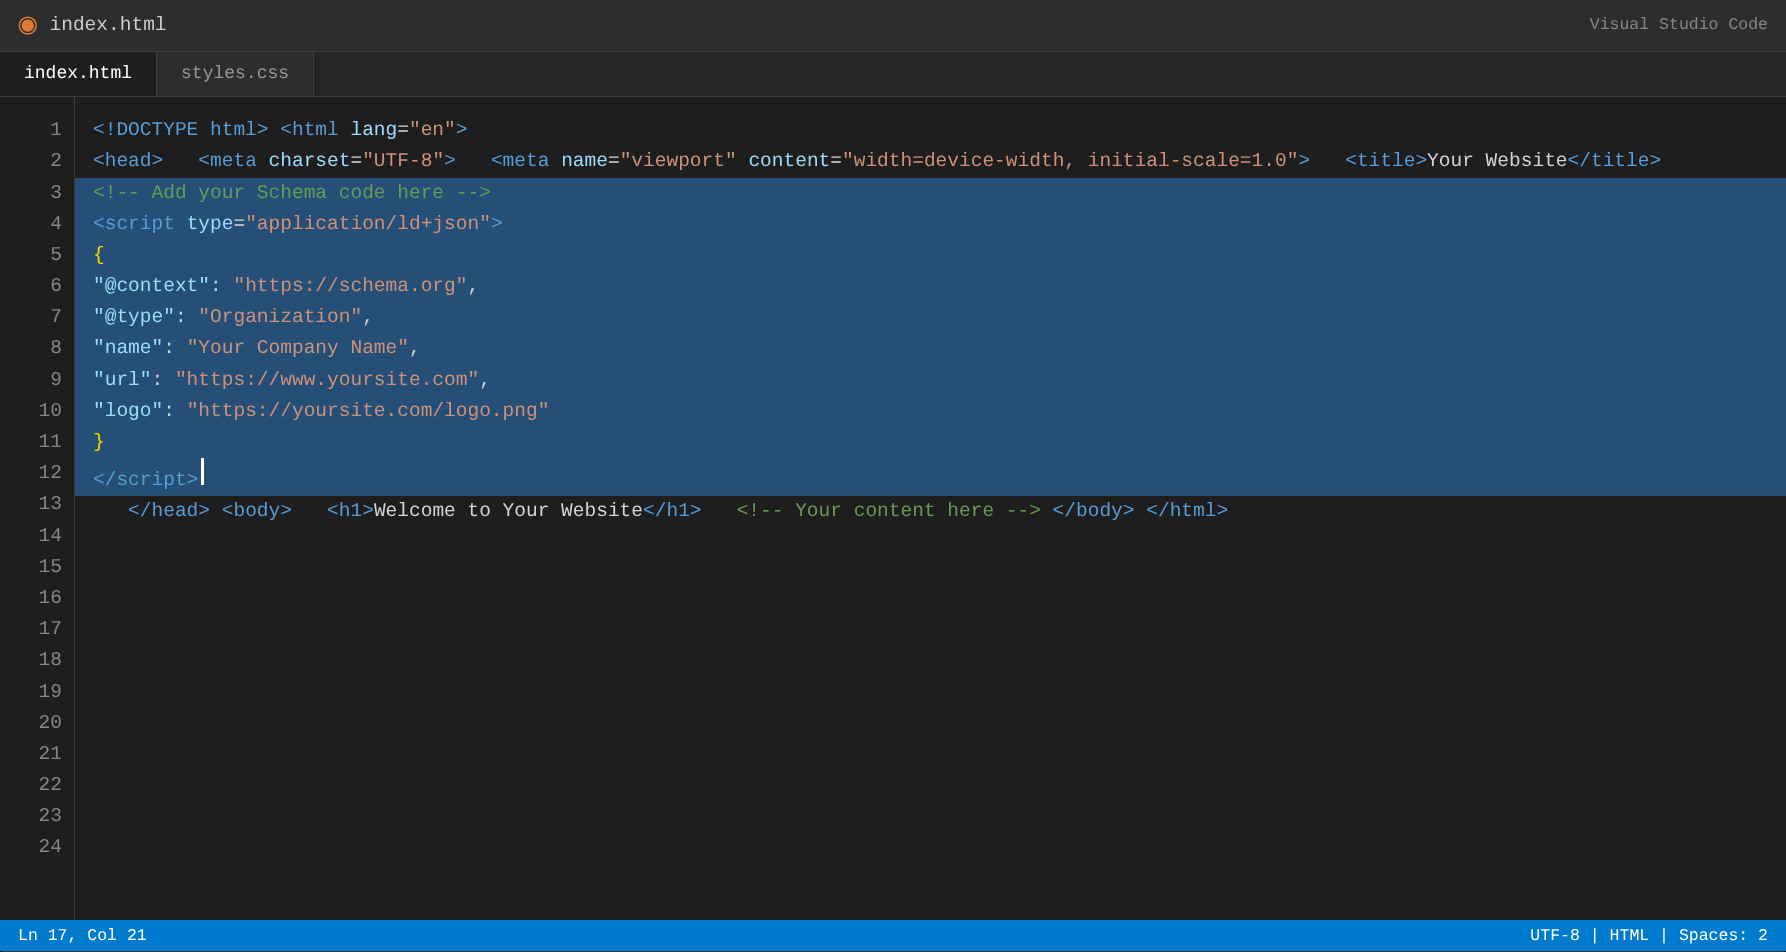
Step 1: Find Where to Actually Put the Schema Code (The Entity Play)
Most people get stuck here immediately. You need access to your website's HTML, specifically the <head> section of each page. How you do this depends on your platform.
- If you're on WordPress, install the plugin called "Insert Headers and Footers" or use Yoast SEO Premium. Yoast has a Schema block built in. Go to the post editor, scroll down to the Yoast section, click on Schema, and you'll see options to add custom Schema blocks. For site-wide Schema like Organization, you'll need to edit your theme's header.php file or use a child theme. If that sounds scary, stick with the plugin route. Insert Headers and Footers lets you paste code that appears on every page without touching theme files.
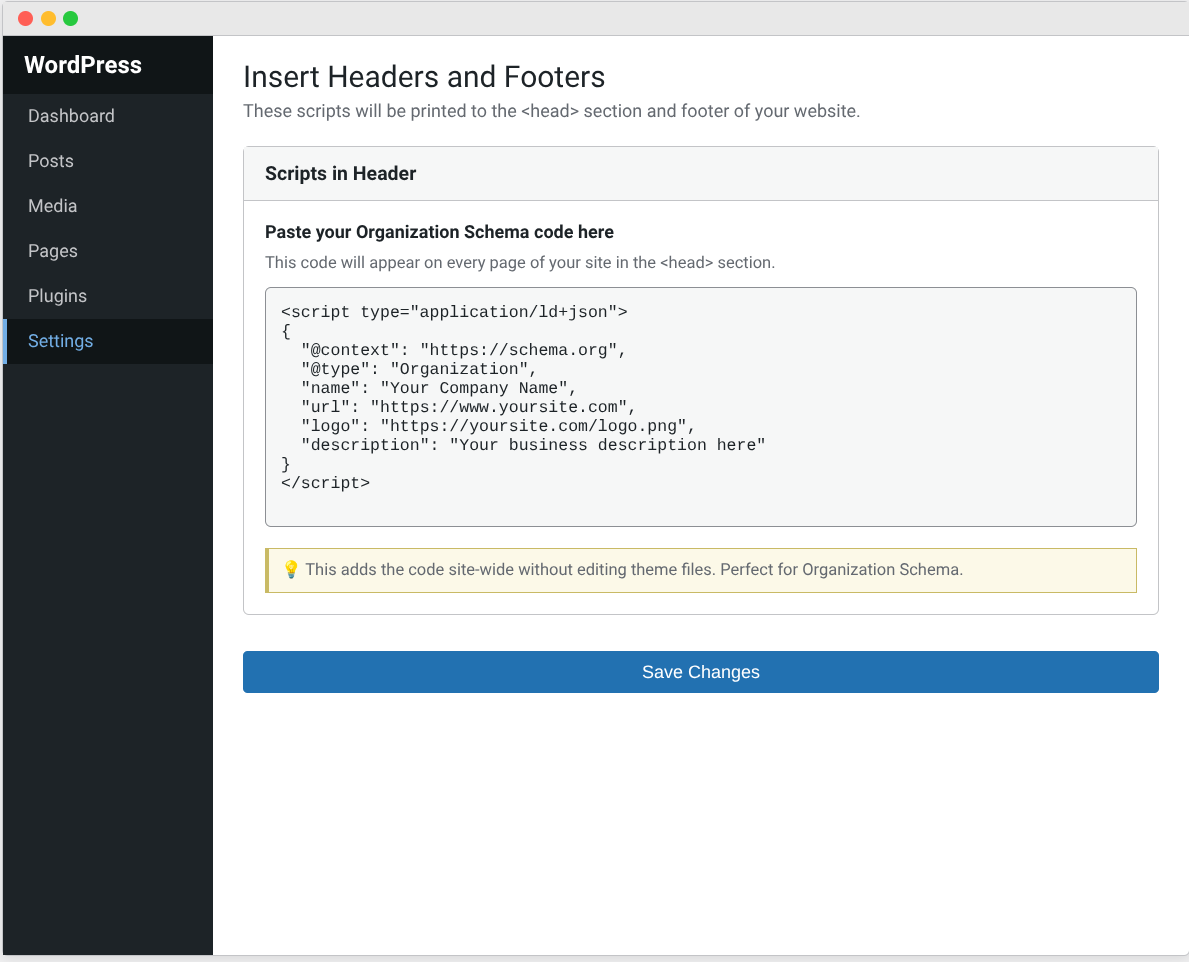
See the next step below on the exact code that should go into the Schema.
- If you're on Shopify, go to Online Store, then Themes, then click Actions and Edit Code. Look for the file called theme.liquid. Find the
</head>tag. Paste your Schema code right above that closing tag. Save it. - If you're on Webflow, click on your page settings, scroll to Custom Code, and paste your Schema into the Head Code section. You'll need to do this page by page unless you add it to the site-wide settings.
- If you're on a custom site, open your HTML file in a code editor. Find the
<head>section. Paste the Schema code anywhere between<head>and</head>. Save and upload the file to your server.
Still lost? Ask your developer or VA to do it. Send them this guide and tell them to add the Schema blocks exactly as written below. This will not take them more than ten minutes.
Step 2: Add Organization Schema to Your Homepage
Here's the exact code for Organization Schema. Swap in your real details and drop this into the <head> section of your homepage.
<script type="application/ld+json">
{
  "@context": "https://schema.org",
  "@type": "Organization",
  "name": "Your Company Name",
  "url": "https://www.yourwebsite.com",
  "logo": "https://www.yourwebsite.com/logo.png",
  "description": "What you do and why you matter in one clear sentence.",
  "sameAs": [
    "https://www.linkedin.com/company/yourcompany",
    "https://twitter.com/yourcompany"
  ],
  "contactPoint": {
    "@type": "ContactPoint",
    "telephone": "+1-555-555-5555",
    "contactType": "Customer Service"
  }
}
</script>
Replace everything in quotes with your actual information. Here's what to change:
- "name": Your exact company name as it appears everywhere else. Don't abbreviate unless that's your legal name.
- "url": Your homepage URL. Include the https:// part. Don't add a trailing slash.
- "logo": The full URL to your logo image. Right-click your logo on your site, choose "Copy Image Address," and paste that here. Common mistake: using a relative URL like "/logo.png" instead of the full URL. AI crawlers need the complete path.
- "description": One sentence explaining what you do. Keep it under 150 characters. Don't stuff keywords but just be clear.
- "sameAs": List your social profiles. LinkedIn and Twitter matter most. Add Facebook or Instagram if they're active and branded properly. Each URL goes in quotes with a comma after it except the last one.
- "telephone": Your real phone number in international format. If you don't want to list a phone, delete the entire contactPoint section from
"contactPoint"down to and including the closing brace and comma.
Common problems and fixes:
- You paste the code and your site breaks or shows weird characters.
Fix: You probably pasted it into a visual editor instead of the HTML editor. WordPress users, make sure you're in the Text tab, not Visual. Shopify users, make sure you're editing the .liquid file, not the theme customizer. - The validator shows errors about missing fields.
Fix: Organization Schema requires name, url, and logo at minimum. Make sure all three are present and the URLs are complete. - Your logo URL keeps breaking.
Fix: Upload your logo to your media library, get the full URL, and make sure it's a .png, .jpg, or .svg file. Some sites compress images or change filenames automatically. Verify the URL actually works by pasting it into a new browser tab.
If you're a personal brand, use Person Schema instead like the following. A personal brand site is typically for consultants, coaches, freelancers, content creators, influencers, authors, speakers, photographers, designers, or anyone selling services under their own name.
The difference matters for Schema because search engines want to know what they're dealing with. Are they looking at a registered business entity with employees and a logo? That's Organization Schema. Or are they looking at an individual professional building reputation and authority under their own identity? That's Person Schema.
<script type="application/ld+json">
{
  "@context": "https://schema.org",
  "@type": "Person",
  "name": "Your Full Name",
  "url": "https://www.yourwebsite.com",
  "image": "https://www.yourwebsite.com/headshot.jpg",
  "jobTitle": "What You Do",
  "description": "One sentence bio that explains your expertise.",
  "sameAs": [
    "https://www.linkedin.com/in/yourname",
    "https://twitter.com/yourhandle"
  ]
}
</script>
Once this goes live, Google starts linking your brand to an entity ID in their Knowledge Graph. LLMs pull from those entity graphs when deciding who to trust and cite.
Step 3: Wrap Every Article in Article Schema (The Attribution Layer)
Every piece of content you publish needs Article Schema. Without it, your article is just anonymous text floating on the web. With it, AI knows who wrote it, when, and what expertise backs it up.
Pick your five most important blog posts or guides. Open each one in your editor. Add this Schema to the <head> section of each page:
<script type="application/ld+json">
{
  "@context": "https://schema.org",
  "@type": "Article",
  "headline": "Your Exact Article Title",
  "description": "One sentence summary of what this article covers.",
  "image": "https://www.yourwebsite.com/article-image.jpg",
  "author": {
    "@type": "Person",
    "name": "Author Name"
  },
  "publisher": {
    "@type": "Organization",
    "name": "Your Company Name",
    "logo": {
      "@type": "ImageObject",
      "url": "https://www.yourwebsite.com/logo.png"
    }
  },
  "datePublished": "2026-01-16",
  "dateModified": "2026-01-16"
}
</script>
Here's what to customize:
- "headline": Your exact article title. Copy it word for word from your H1 tag. Keep it under 110 characters.
- "description": A one or two sentence summary of what the article covers. This should match your meta description if you have one.
- "image": The featured image URL for this article. Same rules as the logo: full URL, not relative path. If your article doesn't have a featured image, use your logo URL here.
- "author" name: The person who wrote it. Use their real full name, not a username or brand name. If you publish under your company name, use the company name here but change
@typeto "Organization" instead of "Person." - "publisher" name: Your company or brand name. Should match exactly what you used in Organization Schema.
- "publisher" logo: Same logo URL you used in Organization Schema. Has to be identical.
- "datePublished": The date you first published this article in YYYY-MM-DD format. January 10, 2026 becomes "2026-01-10." Check your CMS for the actual publish date.
- "dateModified": The last date you updated the content. If you've never updated it, use the same date as datePublished. If you update it today, change this to today's date. If you update an article, ensure to change the
dateModifieddate to signal freshness.
Common problems and fixes:
- Validator says datePublished is invalid.
Fix: Make sure you're using YYYY-MM-DD format with dashes, not slashes. "2026-01-10" works. "01/10/2026" doesn't. - Validator says author or publisher is missing.
Fix: Both are required for Article Schema. Don't delete them. If you really don't want to list an author, you can use your Organization as the author, but you still need a publisher. - You updated the article but dateModified didn't change in the validator.
Fix: Google caches Schema. It can take 3 to 7 days for changes to show up in the Rich Results Test. Clear your site cache, wait 48 hours, then check again.
Step 4: Deploy FAQPage Schema on Your Best Pages (Actual Citation Magnet)
FAQPage Schema is the highest-ROI move you can make for AI citation optimization. LLMs are currently built to answer questions, quickly. When you serve up clean question-answer pairs in structured data, you're giving AI exactly what it needs to quote you.
This is also where most people either nail it or waste their time. FAQ Schema only works if your questions and answers are genuinely useful and quotable. Write 3 to 5 questions that people actually ask about your topic. Then write answers between 50 and 150 words each. Don't fluff it. Answer directly and completely. Too short an answer and AI skips them. Too long and they get summarized instead of quoted. You should aim for the Goldilocks zone where your answer is complete, quotable, and clearly yours.
First, add an actual FAQ section to the bottom of your page and then wrap it in FAQPage Schema. Don't fake simply with Schema and no visible content. AI models check if the Schema matches what's on the page. If it doesn't, you get penalized.
Here's the Schema:
<script type="application/ld+json">
{
  "@context": "https://schema.org",
  "@type": "FAQPage",
  "mainEntity": [
    {
      "@type": "Question",
      "name": "How does Schema markup help with zero-click SEO 2026?",
      "acceptedAnswer": {
        "@type": "Answer",
        "text": "Schema acts as a translator between your content and AI models like GPT-5.2 and Gemini 3. It labels your expertise in machine-readable language, which increases your chances of getting cited even when users never click through to your site."
      }
    },
    {
      "@type": "Question",
      "name": "What is AI citation optimization?",
      "acceptedAnswer": {
        "@type": "Answer",
        "text": "AI citation optimization is the practice of structuring your content so AI models quote you by name in their generated answers. It focuses on building authority inside LLMs through clean structured data rather than chasing traditional traffic metrics."
      }
    },
    {
      "@type": "Question",
      "name": "Which Schema types matter most for LLMs?",
      "acceptedAnswer": {
        "@type": "Answer",
        "text": "Organization, Person, Article, FAQPage, and WebPage schemas provide the clarity AI systems need. These five types give LLMs the context to understand who you are, what you wrote, and why your content should be trusted and quoted."
      }
    }
  ]
}
</script>
Customize it:
- "name": The exact question as it appears on your page. Word for word.
- "text": The full answer as it appears on your page. Copy it exactly. Don't abbreviate or summarize it in the Schema differently than on the page.
- Add more question-answer pairs by copying the entire block from
{aftermainEntitydown to}and pasting it below with a comma separating them.
Common problems and fixes:
- Validator says invalid JSON syntax.
Fix: You're missing a comma or have an extra comma. Every question-answer block needs a comma after it (except the last one). You can use a JSON validator like jsonlint.com to find the exact error. - FAQ Schema isn't showing in Google results.
Fix: Google doesn't guarantee rich results even with perfect Schema. But if it's been 6+ weeks and you're seeing zero impact, check that your questions match search intent. Generic questions like "What is X?" rarely trigger rich results. Specific questions like "How long does X take?" or "What's the difference between X and Y?" perform better. - Schema is valid but the FAQ isn't visible on the page.
Fix: Add the actual FAQ section in HTML before adding Schema. Use<h3>tags for questions and<p>tags for answers. Make it visible to users. Hidden content with Schema gets flagged as manipulative.
Step 5: Validate Everything Before You Publish
Broken Schema is worse than no Schema because it confuses crawlers and tanks credibility. Before you push anything live, validate it.
Go to https://search.google.com/test/rich-results, paste in your page URL, and click "Test URL." Google crawls your page and shows you every Schema object it detected.
- Green checkmarks: You're good.
- Yellow warnings: Not critical but worth fixing. Common warnings include missing optional fields like "address" or "image." You can ignore these if the required fields are all green.
- Red errors: Fix these immediately.
Common errors:
- Missing required field: Go back and add the field listed in the error.
- Invalid URL: Check that all URLs are complete with https:// and actually work when you paste them in a browser.
- Invalid date format: Use YYYY-MM-DD only.
- Mismatched quotes: Every opening quote needs a closing quote.
After fixing errors, paste your code into https://validator.schema.org for a second check. This catches syntax errors Google's tool sometimes misses.
Still seeing errors? Copy the exact error message and search "[error message] schema.org fix" on Google. Schema.org has documentation for every error type.
Beware of common mistakes: Missing commas in the JSON, broken image URLs, forgetting required fields like datePublished in Article Schema. One small syntax error can potentially kill the entire block, so validate thoroughly.
Step 6: Track AI Citations and Double Down on What Works
You obviously can't improve what you don't measure. Set up citation tracking so you know when AI starts quoting you.
Use Google Alerts to monitor your brand name and key phrases. Set alerts for "according to [Your Brand]" or "as [Your Name] explains." When AI summaries cite you, Google Alerts catches it.
Also watch zero-click performance in Google Search Console. Look at impressions versus clicks. If impressions climb but clicks stay flat, your content is showing up in AI Overviews but not driving traffic. That's actually a win in the citation game because it means AI is surfacing your brand authority without users needing to visit your site.
Track which pages get cited most and reverse-engineer the pattern. Usually it's pages with strong FAQPage Schema, recent dates, and clear author attribution. Build more of those.
The Mistakes That Kill Your Citation Chances
- Never keyword-stuff your Schema. AI models detect manipulation instantly and flag your site as low-quality. A better approach is to use natural, accurate descriptions.
- Adding Schema to thin content is not advisable. If your page has 200 words and five Schema objects, crawlers assume you're gaming the system. Schema amplifies good content but can't rescue bad content.
- Avoid copy-pasting generic Schema. AI models compare your Schema claims to your actual page content. Customize wherever (target maximum) you can.
- Don't set it and forget it. Review your Schema every quarter. Schema.org releases new properties regularly. Adding relevant new fields keeps you ahead of competitors still running year-old setups.
The 60-Day Rollout Plan
- Week 1: Add Organization or Person Schema to your homepage. Validate and publish.
- Week 2: Add Article Schema to your five most important pieces. Validate and publish.
- Week 3: Build FAQ sections on your three highest-traffic pages. Add FAQPage Schema. Validate and publish.
- Week 4: Add WebPage Schema site-wide as your baseline semantic layer.
- Weeks 5-8: Monitor citations, impressions, and AI Overviews placements. Adjust Schema based on what's driving results.
- Weeks 9-12: Expand FAQPage Schema to ten more pages. Track which question-answer pairs get quoted most and create more content around those topics.
By day 60 you'll have full Schema infrastructure and enough data to know what's working.
Why Schema for LLMs Matters More Than Traffic Ever Did
Traffic today is a lagging metric, while citations are now a leading indicator of brand authority. When ChatGPT quotes you by name in front of 200 million users, you just earned brand exposure no ad budget could buy.
The brands winning in 2026 are the ones AI trusts enough to cite without hesitation. Schema for LLMs is how you build that trust at scale. Stop chasing clicks and start working on acquiring citations. The sooner you deploy Schema, the sooner AI starts quoting you instead of your competitors.
Next step: Pick one page. Add Schema. Validate it. Publish it. Repeat. You don't need to overhaul everything today. You just need to start building the structured data layer AI will rely on for the next decade.
FAQs
How do I optimize content for AI citations and references?
Focus on completeness over keyword stuffing. AI pulls from content that fully answers questions without requiring multiple sources. Structure each piece around solving one specific problem from start to finish. Use clear subheadings that match how people actually search for information. Include data, examples, and actionable steps that AI can extract and attribute. Avoid vague statements and filler paragraphs that add word count but no real value. The content AI cites most often gives definitive answers with enough detail that readers don't need to look elsewhere.
How do I optimize fintech content for AI citation?
Fintech needs extra precision because AI won't cite content that could mislead people about money. Include specific numbers, regulations, and compliance details that demonstrate you know the space. Reference actual financial products, real world use cases, and concrete outcomes instead of generic advice. AI favors fintech sources that explain complex topics simply while maintaining accuracy. Add disclaimers where appropriate and cite regulatory sources when discussing compliance or legal requirements.
Is there a best AI citation analysis tool for AI optimization?
Not really. The market hasn't settled on a single dominant tool because AI citation tracking is still developing. Google Alerts handles basic monitoring for free and catches most public mentions. Some SEO platforms are adding AI overview tracking features but they're inconsistent as of writing this post. Your best approach combines free tools with manual checking until better options emerge. Set up alerts, track your appearances in AI summaries manually, and maintain a simple log of citations. When dedicated AI citation tools mature and prove their value, you'll have baseline data to compare against.